Manual1 min read
Import Dialog: Pattern Settings and ROI
A practical guide to colour reduction, dithering, matching, and focus areas.
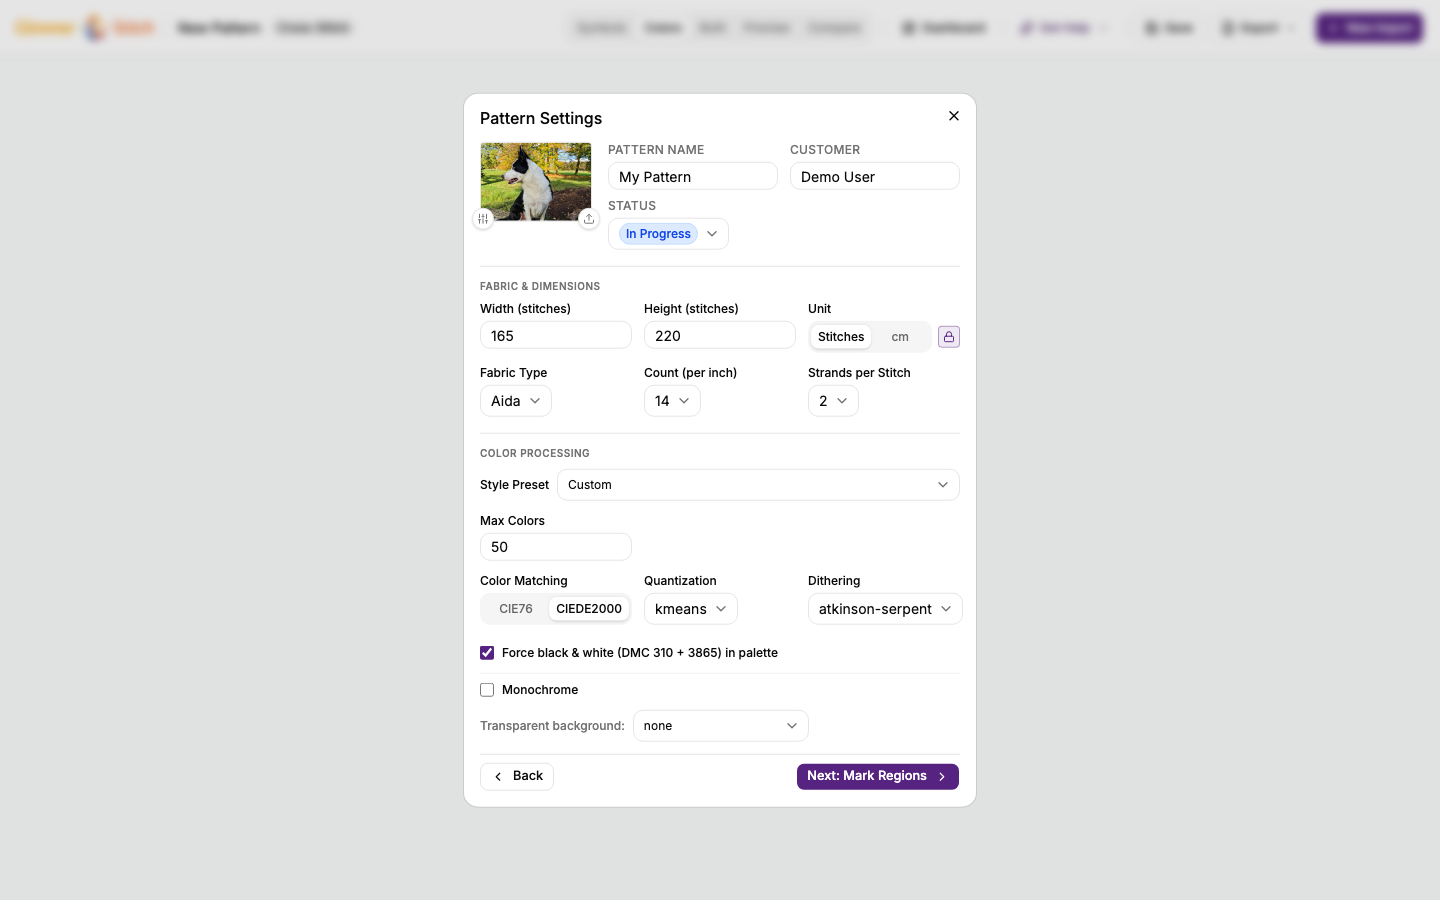
These settings control how your final pattern looks and how easy it is to stitch.
 zoom
zoomMaximum colours (colour reduction)
- Lower value: simpler and faster to stitch.
- Higher value: more detail and smoother shading.
Good starting range for photos: 30 to 50.
Dithering
Dithering creates tiny colour patterns to smooth transitions.
- On: smoother gradients, but more texture/noise.
- Off: cleaner blocks, often easier stitching.
If unsure, generate once with dithering and once without, then compare.
Quantisation (palette selection)
This chooses how the app builds the reduced colour set.
- Keep default first.
- Change only when you compare multiple results.
Colour matching
This decides which thread colour each image colour maps to.
- If colours look unnatural, test another matching method.
- CIEDE2000 is usually a safe general option.
Stitch dimensions and aspect ratio
- Larger stitch size keeps more detail but increases stitch count.
- Keep aspect ratio locked to avoid stretching faces/objects.
Fabric settings (cross-stitch)
- Fabric count affects final physical size.
- Strands affect coverage and thread usage.
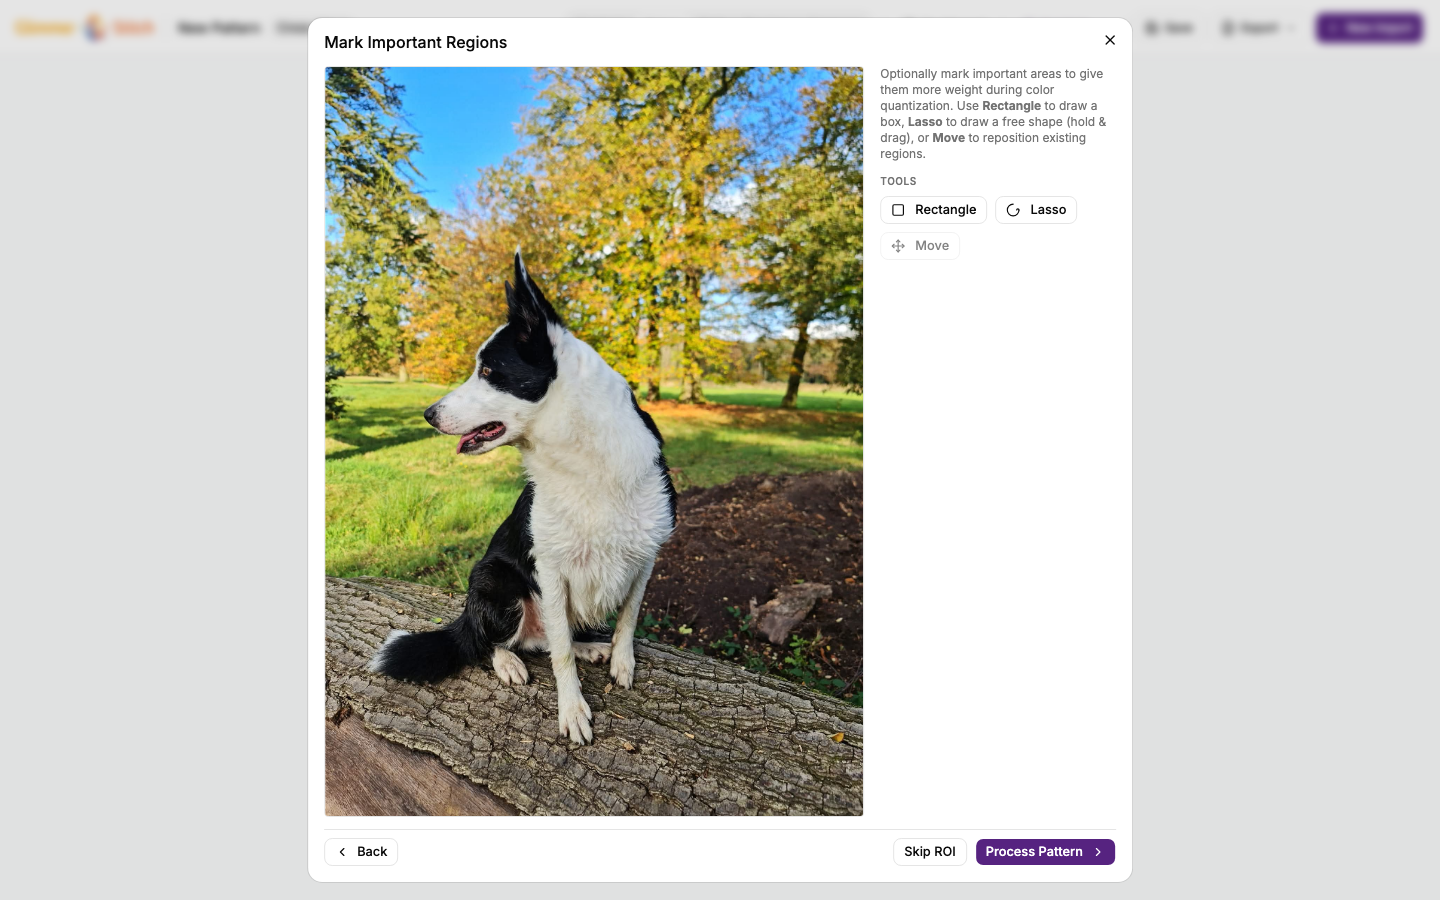
ROI (focus areas)
Use ROI when certain areas are important (faces, text, main subject).
- Mark important areas before processing.
- This helps preserve detail where it matters most.
 zoom
zoom